wtorek, 31 grudnia 2013

Temperature statistics 2010--2013

Average monthly outdoor temperature for Sopot, Abrahama in 2010--2013 (recorded with DS18B20 sensor). Average monthly temperature computed as $t_a = \sum_i^n t_i/n$, where: $t_i$ denotes measurement recorded in month $i$ (the temperature is recorded every hour BTW).

Average monthly outdoor temperature for Sopot

Click to see interactive version and data at plot.ly

The data shows (among other things:-) that December 2013 was really hot.

wtorek, 10 grudnia 2013

A newer version of the Raspberry Pi

I am using Raspberry Pi version A (256 Mb) for more than a year and now I bought one Pi more--model B (512 Mb) this time. I bought a TP-Link WiFi card (TL-WN725N) and a camera as well. The plan is:

  • attach the camera to the old Pi; connect Pi to WiFi network (because all four ports on my router are already occupied)
  • the whole stuff connected to the old Pi (temperature, humidity (DHT-22) and pressure (BMP085) sensors as well as Logitech C270 camera) connect into the new one.

Attaching everything to one single Pi is not an option--I want the camera-equipped Pi to be more portable.

Also I did not want to install a new system but just to use what I use so far (ie the system used on the old Pi):


uname-a
Raspberrystar.pinkaccordions.org Linux 3.2.27 + # 174 PREEMPT ...

Simple inserting the card from the old Pi into the new one did not work (the system did not start). An upgrade is needed probably:


sudo apt-get update
sudo rpi-update
uname-a
Raspberrystar.pinkaccordions.org Linux 3.10.18 +

Now 1-Wire bus stopped working. I also can not start the WiFi adapter TP-Link TL-WN725N. Inspecting Internet forums I discovered that version 3.6.11+ of the kernel may be less problematic in this respect. Therefore, I try to downgrade:


sudo rpi-update 8234d5148aded657760e9ecd622f324d140ae891

The above means to downgrade to the latest of 3.6.11+ versions:


pi @ raspberrystar ~ $ uname-a
Linux 3.6.11 + raspberrystar.pinkaccordions.org # 557 PREEMPT

Now the 1-Wire bus magically started to work. Sensors DHT-22 also work. The program I have used to read data from pressure sensor BMP085 required minor modifications and recompilation (as GPIO layout is different on Pi model B).

WiFi card also works, but require to download an appropriate driver. This one works for me (a copy is here). Other drivers, such as available here or here do not work. Compilation from sources as described here (in Polish is here) ends with an error as well.

Module 8188eu.ko can be installed as follows:


wget http://www.mendrugox.net/downloads/13 -O 818188eu.ko
## albo https://dl.dropboxusercontent.com/u/61315145/PiStuff/8188eu.ko.gz
## after download: gunzip 8188eu.ko.gz

sudo install -p -m 644 8188eu.ko /lib/modules/`uname -r`/kernel/drivers/net/wireless
sudo depmod -a
sudo modprobe 8188eu

The contents of the file /etc/network/interfaces should look like:


auto lo

iface lo inet loopback
iface eth0 inet dhcp

allow-hotplug wlan0
auto wlan0
iface wlan0 inet dhcp
wpa-ssid "NAME OF-NETWORK"
wpa-psk "PASSWORD"

One have to provide correct values for the NAME-NET and PASSWORD of course. The above settings will automatically establish a connection when the system starts.

Changing the host name

Minor thing, but I want to know easily which Pi is which:


## in the last line of /etc/hosts change host name
sudo vi /etc/hosts

## insert host name (this file contains only 1 line with a host name:)
sudo vi /etc/hostname

sudo /etc/init.d/hostname.sh
sudo reboot

The file /etc/hosts looks something like this:


127.0.0.1 localhost
:: 1 localhost ip6-localhost ip6-loopback
fe00 :: 0 ip6-localnet
ff00 :: 0 ip6-mcastprefix
ff02 :: 1 ip6-allnodes
ff02 :: 2 ip6-allrouters

127.0.1.1 blackberrystar

Camera

Updated system was cloned on a second card (Btw. for years I use Toshiba SDHC 8GB Class 10. This card is advertised as SLC but on card packaging/casing there is no word about it. SLC or not SLC I had never any problem with this card.)

Pi + kamera
Pi + camera

First picture

How to connect a camera to the Pi can be seen at one of the many videos on YouTube.

I followed instructions from How to set up the camera hardware.

Since I have not done this before:


pi@blackberrystar ~ $ sudo apt-get update
pi@blackberrystar ~ $ sudo apt-get upgrade

Now:


pi@blackberrystar ~ $ sudo raspi-config

I Choose Enable/Disable camera addon support and Memory split. I have not decided on the suggested 128 Mb for the GPU, bearing in mind that all the memory in my Pi is 256 Mb. Perhaps I am wrong and recommended 128MBs is better.

Test if it works:


pi@blackberrystar ~ $ mkdir picam
pi@blackberrystar ~ $ cd picam
pi@blackberrystar ~ $ raspistill -o image.jpg

The result (the first picture taken) is shown on the picture.

sobota, 16 listopada 2013

Nowsza wersja Raspberry Pi

Do posiadanego Raspberry Pi w wersji A (256 Mb) dokupiłem parę dni temu drugi egzemplarz, tym razem w wersji B (512 Mb). Kupiłem też kartę WiFi TP-link TL-WN725N oraz kamerę. Plan jest taki:

  • kamerę podłączyć do starego Pi (kupionego w sierpniu 2012); udostępnić je poprzez WiFi, chociażby dlatego że wszystkie 4 porty w moim ruterze są już zajęte.
  • to co było podpięte do starego Pi (pomiar temperatury, wilgotności (DHT-22) i ciśnienia (BMP085) oraz kamera Logitech C270) podpiąć pod nowe.

Doczepienie wszystkiego do jednego komputerka nie wchodzi w grę bo docelowo kamera ma być mobilna.

Nie chciałem instalować nowego systemu tylko skorzystać z tego co używam do tej pory (tj. system używany na starym Pi):


uname -a
Linux raspberrystar.pinkaccordions.org 3.2.27+ #174 PREEMPT ...

Prosta wymiana karty nie działa (system się nie uruchamia). Potrzebny jest zapewne upgrade:


sudo apt-get update
sudo rpi-update
uname -a
Linux raspberrystar.pinkaccordions.org 3.10.18+

Teraz przestała działać magistrala 1-Wire. Nie mogę też uruchomić karty WiFi TP-link TL-WN725N. Gdzieś na forach doczytałem, że wersja 3.6.11+ może być pod tym względem mniej problematyczna. Zatem próbuję:


sudo rpi-update 8234d5148aded657760e9ecd622f324d140ae891

Powyższe oznacza cofnięcie się do najstarszej wersji oznaczonej symbolem 3.6.11+:


pi@raspberrystar ~ $ uname -a
Linux raspberrystar.pinkaccordions.org 3.6.11+ #557 PREEMPT

Teraz magistrala 1-Wire magicznie zaczęła działać. Czujniki DHT-22 też działają. Czujnik ciśnienia BMP085, obsługiwany przez program opisany tutaj, wymagał drobnej modyfikacji i przekompilowania, bo zmienił się układ wejść GPIO.

Karta WiFi też działa, ale wymagała ściągnięcia stosownego sterownika. U mnie działa ten (kopia jest tutaj). Natomiast inne, np. udostępniane tu albo tutaj nie działają. Także kompilacja wg. sposobu opisanego tutaj (po polsku jest tutaj) kończy się błędem.

Moduł 8188eu.ko należy zainstalować w następujący sposób:


wget http://www.mendrugox.net/downloads/13 -O 818188eu.ko
## albo https://dl.dropboxusercontent.com/u/61315145/PiStuff/8188eu.ko.gz
## po ściągnięciu: gunzip 8188eu.ko.gz

sudo install -p -m 644 8188eu.ko /lib/modules/`uname -r`/kernel/drivers/net/wireless
sudo depmod -a
sudo modprobe 8188eu

Zawartość pliku /etc/network/interfaces powinna wyglądać następująco:


auto lo

iface lo inet loopback
iface eth0 inet dhcp

allow-hotplug wlan0
auto wlan0
iface wlan0 inet dhcp
wpa-ssid "NAZWA-SIECI"
wpa-psk "HASŁO"

Należy oczywiście podać prawidłowe wartości dla NAZWY-SIECI oraz HASŁA. Takie ustawienie powoduje automatyczne ustanowienie połączenia po uruchomieniu systemu.

Zmiana nazwy hosta

Sprawa drobna ale potrzebna żeby wiedzieć który jest który:


## w ostatnim wierszu /etc/hosts zmień nazwę hosta
sudo vi /etc/hosts

## wpisz nazwę hosta (ten plik zawiera jeden wiesz, nazwę hosta):
sudo vi /etc/hostname

sudo /etc/init.d/hostname.sh
sudo reboot

W rezultacie mój plik /etc/hosts wygląda jakoś tak:


127.0.0.1 localhost
::1 localhost ip6-localhost ip6-loopback
fe00::0 ip6-localnet
ff00::0 ip6-mcastprefix
ff02::1 ip6-allnodes
ff02::2 ip6-allrouters

127.0.1.1 blackberrystar

Kamera

Uaktualniony i działający na nowym Pi system sklonowałem na drugą kartę (BTW. Od lat używam kart Toshiba SDHC 8GB Class 10. Karta ta jest reklamowana jako typu SLC aczkolwiek na opakowaniu/karcie nie ma o tym ani słowa. SLC czy nie SLC nigdy nie miałem z tą kartą żadnych problemów.)

Pi + kamera
Pi + kamera

Pierwsze zdjęcie

Jak podłączyć kamerę do komputerka można obejrzeć na jednym z licznych filmów na YouTube.

Dalej postępowałem wg. instrukcji na stronie How to set up the camera hardware.

Ponieważ wcześniej tego nie robiłem:


pi@blackberrystar ~ $ sudo apt-get update # na wszelki wypadek
pi@blackberrystar ~ $ sudo apt-get upgrade

teraz:


pi@blackberrystar ~ $ sudo raspi-config

Wybieram Enable/Disable camera addon support a następnie Memory split. Nie zdecydowałem się na sugerowane wydzielenie 128 Mb na GPU, mając na uwadze, że cała pamięć w moim Pi to raptem 256 Mb. Być może niepotrzebnie się spłoszyłem -- doczytam jeszcze na ten temat.

Test czy działa:


pi@blackberrystar ~ $ mkdir picam
pi@blackberrystar ~ $ cd picam
pi@blackberrystar ~ $ raspistill -o image.jpg

Wynik (pierwsze wykonane zdjęcie) jest zamieszczony obok.

niedziela, 6 października 2013

SimpleCart.js

Koledze założyłem sklep--nie sklep (katalog książek z możliwością złożenie zamówienia.) Koszyk obsługuje aplikacja w JavaScript pn. SimpleCart.js. Na początek powinno koledze GB wystarczyć (albo i nie....)

Nie działa toto z Internet Explorerem wersja 7 ale na szczęście mało kto dziś używa IE 7. Zrobiłem upgrade swojego (a raczej Jaśka bo ja nie korzystam z Windows) do IE 8 i zaczęło działać. Jeszcze się temu przyjrzę...

poniedziałek, 23 września 2013

Pobranie zawartości zbioru/grupy zdjęć z flickr.com

Zbiór to set a grupa to pool. Zbiór zawiera zdjęcia jednego użytkownika a grupa (pool) to zbiór zdjęć różnych użytkowników. To tak tytułem wyjaśnienia.

Flickr API zawiera funkcje flickr.groups.pools.getPhotos oraz flickr.photosets.getPhotos, które zwracają informacje o zdjęciach należących do określonego zbioru (albo grupy). Wynik wygląda jakoś tak:


<photoset id="4" primary="2483" page="1" perpage="500" pages="1" total="2">
<photo id="2484" secret="123456" server="1" title="my photo" isprimary="0" />
<photo id="2483" secret="123456" server="1" title="flickr rocks" isprimary="1" />
</photoset>

Poniższy skrypt wykorzystujący flickr.groups.pools.getPhotos/flickr.photosets.getPhotos ściąga informacje o zdjęciach dodanych do grupy/zbioru. Wynik zapisuje w Perlowej notacji:


@photos=( {'id'=>"2484", 'secret'=>"123456", 'server'=>"1", 'title'=>"my photo", 'isprimary'=>"0"},
{'id' =>"2483", 'secret'=>"123456", 'server'=>"1", 'title'=>"flickr rocks", 'isprimary'=>"1", );

Jest to zatem gotowy do dołączenia do innego skryptu np. za pomocą require kod Perla (lista haszy). Ściągana jest informacja o grupie lub zbiorze określonej/określonym przez podanie stosownego id:


flickr_albums.getPhotos.pl -s set-id
# albo
flickr_albums.getPhotos.pl -p group-id

Uwaga: moduł login2flickr.rc deklaruje m.in stosowną wartość api_key co jest niezbędne do korzystania z API flickra.


#!/usr/bin/perl
#
use Flickr::API;
use Compress::Zlib;
use Getopt::Long;
use XML::DOM;

require 'login2flickr.rc'; # prywatny moduł do

$set_id = $pool_id = $method = $Photos='';

GetOptions( "set=s" => \$set_id, "pool=s" => \$pool_id, ) ;

if ( $set_id ne "" ) {
$root_ele = 'photoset';
$method = 'flickr.photosets.getPhotos';
$ofname = "set-${set_id}.ph";
}
elsif ( $pool_id ne "" ) {
$root_ele='photos';
$method = 'flickr.groups.pools.getPhotos';
$ofname = "pool-${pool_id}.ph";
} else {
die "*** Podaj id zbioru/pula (set-id/pool-id)\n";
}

## ### ### ### ### ###
my $extras = 'date_taken,views,url_o,url_m,geo,tags';

my $api = new Flickr::API({'key' => $api_key, secret => $sharedsecret});
my $parser = XML::DOM::Parser->new();

my $nbrPages = $photoIdx = 0;

do
{
my $params = { per_page => 500, page => $nbrPages+1, extras => $extras };

$params->{group_id} = $pool_id if $pool_id;
$params->{photoset_id} = $set_id if $set_id;

##print STDERR "*** Method/params: $method, $params ***\n";
my $response = $api->execute_method($method, $params );

die "Problem: $response->{error_message}\n" if !$response->{success};

## sprawdz czy _content nie jest gzipniety, jezeli to rozpakuj:
my $content_encoding = $response->{_headers}->{'content-encoding'} ;
my $plain_content ;

if ($content_encoding =~ /gzip/ ) {
$plain_content = Compress::Zlib::memGunzip( $response->{_content});
} else { $plain_content = $response->{_content}; }

my $log = $parser->parse($plain_content);

## Dane są podzielone na strony o maksymalnej wielkości 500 zdjęć:
for $ps ( $log->getElementsByTagName( $root_ele ) ) {
if ($ps->getAttributeNode ("page") ) { $page = $ps->getAttributeNode ("page")->getValue(); }
if ($ps->getAttributeNode ("pages") ) { $pages = $ps->getAttributeNode ("pages")->getValue(); }
}

print "*** Page $page of $pages ***\n";

## dla każdego elementu:
for $p_ ( $log->getElementsByTagName('photo') ) {
$element_content='';

## zapisz wszystkie atrybuty
if ($p_ ->getAttributes() !=null){
$numberAttributes = $p_->getAttributes()->getLength();
}

for ($loopIndex =0; $loopIndex < $numberAttributes; $loopIndex++) {
$attribute = ($p_ -> getAttributes())->item($loopIndex);
$attrname = $attribute->getNodeName();
$attrvalue = $attribute->getNodeValue();
$element_content .= "'$attrname' => '$attrvalue', ";
}

$Photos .= "{ $element_content },\n";
$photoIdx++;
}

++$nbrPages;

} while ($page < $pages );

## ## ###
print STDERR "Writing to $ofname\n";
open (OFILE, ">$ofname");
print OFILE "## Created with $method\n\@photos = (\n $Photos \n);\n1;\n";
close OFILE;

print STDERR "*** $photoIdx photos written to $ofname ***\n";

Skrypt jest do pobrania tutaj.

sobota, 31 sierpnia 2013

Importowanie i wyświetlanie plików KML w Google Maps

Ubocznym skutkiem dodania współrzędnych geograficznych do zdjęć za pomocą skryptu gpsPhoto.pl jest plik w formacie KML. Każde zdjęcie w takim pliku jest oznakowane jak na przykładzie:


#1: Import do GMaps

#2: Z pinkaccordions

#3: Z sites.google.com

#4: Z sites.google.com

#5: Z serwera chello.pl

<Placemark>
<name>s300013_08275298.jpg</name>
<description><![CDATA[<a href="/home/tomek/Obrazy/s300013_08275298.jpg">
<img src="/home/tomek/Obrazy/s300013_08275298.jpg" width="200" /></a><br>
<a href="/home/tomek/Obrazy/s300013_08275298.jpg">full size</a>]]>
</description>
<Point>
<altitudeMode>clampToGround</altitudeMode>
<coordinates>16.496808361,53.466461571,122</coordinates>
</Point>

Dawno temu zrobiłem skrypt, który podmienia adres w lokalnym systemie plików (taki jak /home/tomek/Obrazy/s300013_08275298.jpg) na tenże plik, ale umieszczony na moim koncie w serwisie flickr.com:


<Placemark>
<name>s300013_08275298.jpg</name>
<description><![CDATA[<a href="http://www.flickr.com/tprzechlewski/9615076609/">
<img src="http://static.flickr.com/7411/9615076609_a243eed0f1_m.jpg" width="200" /></a><br>
<a href="http://www.flickr.com/tprzechlewski/9615076609/">full size</a>]]>
</description>
... itd ...

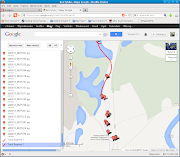
Taki plik za pomocą kilku klików importowałem do mapy Google (Mapy→Moje Miejsca → utwórz w klasycznej wersji Moich map) i działało -- do zeszłego piątku, kiedy to plik KML z wycieczki do Nadarzyc uparcie nie chciał się poprawnie wyświetlić (#1 -- obcięty ślad w okolicach Nadarzyc).

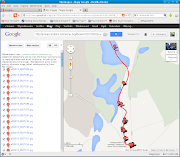
Konsultując problem via Google dowiedziałem się, że cyt KML upload and rendering has always been problematic with Maps i że lepiej (jeżeli już) to nie importować KML tylko wyświetlić go podając URL do dokumentu KML jako wartość parametru q. Przykład:


https://mapy.google.pl/maps?q=http://pinkaccordions.homelinux.org/Geo/kml/20130828__MP.kml

Działa (rys. #2). Ponieważ serwer pinkaccordions.homelinux.org jest rachityczny pomyślałem, że dobrze by było plik KML umieścić w jakimś lepszym miejscu, np. na witrynie sites.google.com. Jest nawet dedykowany -- i niestary bo z 2010 roku -- dokument w temacie pn. Using Google Sites to Host Your KML

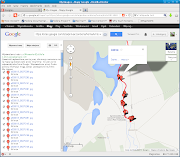
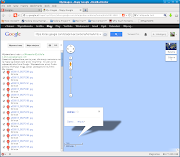
Niestety plik KML pobierany z http://sites.google.com/site/ nie wyświetla się poprawnie. Po kliknięciu w ikonę niektórych zdjęć otwiera się okno ale jest ono puste (#3) i/lub nie wskazuje na stosowne miejsce na mapie (por. #4). Kombinowałem jak toto poprawić ale nie doszedłem do żadnych pozytywnych wniosków: połączenie GMaps + KML + sites.google.com nie działa.

PS: przypomniałem sobie, że mój Internet Provider daje w pakiecie konto na serwerze WWW z limitem 200Mb (z którego do tej pory mało korzystałem)... Sprawdziłem -- działa. Będę zatem tam trzymał pliki KML/KMZ (Rys. #5.)

Wycieczka do Bornego Sulinowa

We wtorek pojechaliśmy do Nadarzyc koło Bornego Sulinowa (Gross Born). Głównym punktem wycieczki był spływ rzeką Piławą. Byliśmy na miejscu (agroturystyka U Stasia w Nadarzycach nad brzegiem Piławy) tuż po 11:00. Dalej standard: pojechaliśmy samochodem właściciela i jego kajakami do mostu nad Piławą we wsi Liszkowo. Około 12:00 z tego miejsca zaczęliśmy spływ, który skończyliśmy U Stasia tuż przed 18:00.

Miejscami jest bardzo szeroko, miejscami rzeczka jest płytka i wąska. Jest odcinek z przeszkodami (zwalone drzewa), ale da się płynąć. Dwa razy trzeba przenieść kajak.

Drugi raz w życiu widziałem zimorodka!

Rzeczka jest malownicza a miejsce wydaje się odludne (byliśmy wszakże ,,po sezonie''). Płynąc Piławą warto zapoznać się z trasą, mieć GPSa albo mapę bo na jeziorach są czasami wątpliwości ,,którędy dalej...''

Następnego dnia poszwendaliśmy się po Bornym Sulinowie oraz zwiedziliśmy kirkut w Jastrowie.

Ślad całej wycieczki (ze zdjęciami) jest tutaj.

sobota, 24 sierpnia 2013

Konwersja z WordPressa do Bloggera

Kol. DM pisze sobie bloga używając WordPressa. Trochę go to kosztuje więc pojawiła się koncepcja żeby przeszedł na bezpłatnego Bloggera. Początkiem tej koncepcji jest oczywiście konwersja WP do formatu Bloggera.

Wpisy kol. DM zawierają tekst i dużo zdjęć oraz innych rysunków. Nie mam bladego pojęcia nt. WordPressa, ale dość szybko ustaliłem, że można wyeksportować treść posługując się stosowną funkcją dostępną z Kokpit→Narzędzia→Eksport (powstaje plik w formacie WordPress eXtended RSS -- WXR).

Plik WXR zapisujemy na dysku. Można go zamienić do formatu Bloggera korzystując z konwertera dostępnego tutaj. Jest wprawdzie napisane, że konwerter obsługuje pliki nie większe niż 1Mb, ale mój miał 4Mb i też poszło.

Plik kolegi DM zawiera tekst oraz prawidłowe linki do niektórych rysunków. Inne rysunki są wstawiane sprytnym czymś co nazywane jest shortcode (cf Shortcode API.) Nie wchodząc w szczegóły, zamiast rysunków w treści postu jest umieszczone np. coś takiego:


[nggallery id=506]

506 z kolei jest identyfikatorem zbioru rysunków, które fizycznie są przechowywane w katalogu:


wp-content/gallery

Każda galeria jest w oddzielnym katalogu, ale nazwami katalogów nie są identyfikatory typu 506 ale coś innego. Logując się do phpMyAdmin byłem w stanie ściągnąć całą bazę (w formacie SQL), w której siedzi WordPress. W jednej z tabel bazy znalazłem przypisanie id_galeriinazwa-katalogu-z-plikami


INSERT INTO `wp_ngg_gallery` (`gid`, `name`, `slug`,
`path`, `title`, `galdesc`, `pageid`, `previewpic`, `author`) VALUES
(17, 'gottardo_2', '', 'wp-content/gallery/gottardo_2', '', '', 0, 0, 1),
(16, 'gottardo_1', '', 'wp-content/gallery/gottardo_1', '', '', 0, 0, 1),
(15, 'nufenen', '', 'wp-content/gallery/nufenen', NULL, NULL, 0, 0, 1),
... itd ...

Czyli zawartość czegoś, co w treści wygląda jak:


[nggallery id=15]

Znajduje się w katalogu wp-content/gallery/nufenen.

Teraz ściągnąłem cały katalog wp-content na dysk lokalny wykorzystując ncftp


ncftp -u USER -p PASS HOST
get -R -T wp-content

Następnie zamieniłem nazwy plików w następujący sposób:


nr_galerii__nazwa_pliku

Pliki wysłałem na google za pomocą skryptu. Istotne jest to, że skrypt po załadowaniu, zwraca URL zdjęcia pod którym jest ono dostępne na koncie googla:


100__fra_07063.jpg https://blogger.googleusercontent.com/img/b/R29vZ2xl/AVvXsEgnGM8VIJfmKu-dEbNbqqqNEV0DwoloVFw9uktPM6qJpmYSzKJITMugQqH2B0MeTAAFAgCX9o3vRmytf1UvdoBaA5TieHIgp3byMZFEtNmu9RfVCYzzN0xBdtq5wamOf_OMhqbHj4CxwYPt/
100__fra_07064.jpg https://blogger.googleusercontent.com/img/b/R29vZ2xl/AVvXsEjPtWKcJyxiQsoE03R_7UAS-ScRhy-VtXpQ9swfpgaz6S8v_ypfliLJnIFDD92ae9Ctj31J_zLUaara8zC4pPp26Tkv2qzx2jZexmIdHMoX0qIdI9vuw3FE1oiNUCnZZwNSLkxVyYxUBCxX/
itd...

Czyli zdjęcie 100__fra_07063.jpg (oryginalnie należące go galerii o identyfikatorze równym '100') jest dostępne pod adresem:


https://blogger.googleusercontent.com/img/b/R29vZ2xl/AVvXsEgnGM8VIJfmKu-dEbNbqqqNEV0DwoloVFw9uktPM6qJpmYSzKJITMugQqH2B0MeTAAFAgCX9o3vRmytf1UvdoBaA5TieHIgp3byMZFEtNmu9RfVCYzzN0xBdtq5wamOf_OMhqbHj4CxwYPt/

Uwaga: Album ze zdjęciami na koncie googla może zawierać maksymalnie 1000 zdjęć. Jeżeli zdjęć jest więcej trzeba utworzyć więcej albumów.

Skryptem Perla (wyrażenia regularne/regułowe) zamieniam każde [nggallery id=506] na stosowny ekwiwalent. Przykładowo:


&lt;div id='gid_g509'&gt;
&lt;span&gt;&lt; a href="https://blogger.googleusercontent.com/img/b/R29vZ2xl/AVvXsEhGXJg1WrcrBW1kJl3RJn9FPNSWk2hFjiC6dgFfslV3yjdpco2aIMEeYaQXQkirZuahaKiXCTQOqhcW7c1NQAXOpRBjCzyfQWiMptLCozUJy91d83j0gp2YncFkXvcwvHLaSPv3mfaxJJWo/"
imageanchor="1" style="margin-bottom: 1em; margin-right: .1em;"&gt;
&lt;img border="0" src="https://blogger.googleusercontent.com/img/b/R29vZ2xl/AVvXsEhGXJg1WrcrBW1kJl3RJn9FPNSWk2hFjiC6dgFfslV3yjdpco2aIMEeYaQXQkirZuahaKiXCTQOqhcW7c1NQAXOpRBjCzyfQWiMptLCozUJy91d83j0gp2YncFkXvcwvHLaSPv3mfaxJJWo/s128/509__1106_016.jpg"
height='85' /&gt;&lt;/a&gt;
&lt;/span&gt;
... itd ...

Pozostałe zdjęcia mają `prawdziwe URLe' (a nie jakieś shortcody), ale oczywiście URLe te są złe bo wskazują na starego hosta. Zdjęcia te (z `prawdziwymi URLami') są przechowywane w katalogu ./wp-content/uploads. Ze zdjeciami postępuję, tak jak w przypadku zdjęć z galerii: 1) wysyłam na konto google skryptem; 2) zmieniam oryginalne URLe na URLe z konta google (skryptem Perla).

Przed importem do Bloggera warto sprawdzić czy plik, który ma być zaimportowany jest well-formed:


xmllint plik-do-zaimportowania.xml

czwartek, 22 sierpnia 2013

Problematyczny Lightbox w Bloggerze

Kliknięcie zdjęcia lub obrazu zamieszczonego na blogu powoduje wyświetlenie go w nakładce na stronie. Jest to tzw. widok Lightbox. (cf. Widok Lightbox w Bloggerze):

<div>
<span>
<a href="https://blogger.googleusercontent.com/img/b/R29vZ2xl/AVvXsEjU6xuLcKQQ-_ccqmRlM7tjekEMVB4Jgx2UvxS8wqL5154fLo383vlvKYmL4wvghW9wCu6nIyGyvW5eyEv4TNkScK3qc0zGJxZ4EOAC7Pb0YWWnBFGpDgcrmXwqNFP1au-D_nwrdBMPd78N/" 
 imageanchor="1" style="margin-bottom: 1em; margin-right: .1em;"><img border="0" 
 src="https://blogger.googleusercontent.com/img/b/R29vZ2xl/AVvXsEjU6xuLcKQQ-_ccqmRlM7tjekEMVB4Jgx2UvxS8wqL5154fLo383vlvKYmL4wvghW9wCu6nIyGyvW5eyEv4TNkScK3qc0zGJxZ4EOAC7Pb0YWWnBFGpDgcrmXwqNFP1au-D_nwrdBMPd78N/s128/epl313_6040342.jpg" /></a>
</span>
<span>
<a href="https://blogger.googleusercontent.com/img/b/R29vZ2xl/AVvXsEi8MsKjD61FOS9mOciTMc2srBAy9YeDnFfq05r_PPhFA8-psqNilfs5hkET159ViIBg07tw9kJBFT2Yy-aI7KplfVUNvmICu07pwX0Q2UPiQenTfmKh11P_ZrAs1_aRZjdeDiHTOyyy-gu6/" 
 imageanchor="1" style="margin-bottom: 1em; margin-right: .1em;"><img border="0" 
 src="https://blogger.googleusercontent.com/img/b/R29vZ2xl/AVvXsEi8MsKjD61FOS9mOciTMc2srBAy9YeDnFfq05r_PPhFA8-psqNilfs5hkET159ViIBg07tw9kJBFT2Yy-aI7KplfVUNvmICu07pwX0Q2UPiQenTfmKh11P_ZrAs1_aRZjdeDiHTOyyy-gu6/s128/epl313_6040338.jpg" /></a>
</span>
<span>
<a href="https://blogger.googleusercontent.com/img/b/R29vZ2xl/AVvXsEhA059OOx8ZLS7XqpiZ94iAZ7fdepsU3VAnGCeZ01SiDImelMrjHZwBd5g_o9shvBVB4Ut6x-_cfDrT51VvTc8KuQ7VlCYcZhOr0kEFenfurTKIs_rescLpAKu3-QbCtdwMmDEFaehvU3FM/" 
 imageanchor="1" style="margin-bottom: 1em; margin-right: .1em;"><img border="0" 
 src="https://blogger.googleusercontent.com/img/b/R29vZ2xl/AVvXsEhA059OOx8ZLS7XqpiZ94iAZ7fdepsU3VAnGCeZ01SiDImelMrjHZwBd5g_o9shvBVB4Ut6x-_cfDrT51VvTc8KuQ7VlCYcZhOr0kEFenfurTKIs_rescLpAKu3-QbCtdwMmDEFaehvU3FM/s128/epl313_6040339.jpg" /></a>
</span>
<span>
<a href="https://blogger.googleusercontent.com/img/b/R29vZ2xl/AVvXsEg0jT3S-QbEQ4sUexmIQoryhbi2C53tWrO0yHFrZyhRI-Q3naU_KxDipx0005eXd5t6WTgGwcpHnPDJyYWSG1en1R7aEmtpFxkJbc0tRWjQj3lr2_jNtfNn9B-FAVrtLenz8qLyizwxvOq1/" 
 imageanchor="1" style="margin-bottom: 1em; margin-right: .1em;"><img border="0" 
 src="https://blogger.googleusercontent.com/img/b/R29vZ2xl/AVvXsEg0jT3S-QbEQ4sUexmIQoryhbi2C53tWrO0yHFrZyhRI-Q3naU_KxDipx0005eXd5t6WTgGwcpHnPDJyYWSG1en1R7aEmtpFxkJbc0tRWjQj3lr2_jNtfNn9B-FAVrtLenz8qLyizwxvOq1/s128/epl313_6040332.jpg" /></a>
</span>
</div>

Wynik jest następujący (kliknij w zdjęcie aby przejść do widoku Lightboksa):

W powyższym przykładzie zawartość atrybutów href i src jest prawie identyczna, bo różni się wyłącznie fragmentem s128/. Jest to przykład zastosowania sprytnego URLa, który spowoduje automagiczne przeskalowanie zdjęcia, tak aby dłuższy wymiar miał maksymalnie 128 pikseli. Jeżeli zamiast s128/ wstawimy s128-c/ albo s128-p/, to spowoduje to automagiczne wycięcie kwadratu o wymiarach maksymalnych 128 pikseli (crop). Przykład:

<div>
<span>
<a href="http://lh3.ggpht.com/…/epl313_6040338.jpg" 
 imageanchor="1" style="margin-bottom: 1em; margin-right: .1em;"><img border="0" 
 src="http://lh3.ggpht.com/…/s128-c/epl313_6040338.jpg" /></a>
</span>
<span>
<a href="http://lh3.ggpht.com/…/epl313_6040338.jpg" 
 imageanchor="1" style="margin-bottom: 1em; margin-right: .1em;"><img border="0" 
 src="http://lh3.ggpht.com/…/s128-p/epl313_6040338.jpg" /></a>
</span>

Symbolem oznaczono pominiętą część URLa (żeby nie wystawał na margines).

Wynik (kliknięcie w zdjęcie nie powoduje przejścia do widoku Lightboksa):

BTW: Liczba 128 nie jest magiczna, można przeskalować obrazek na inny wymiar.

Jeżeli zdjęcia są różnych wymiarów (portret/pejzaż), to s128-c/ (albo s128-p/) jest lepsze niż zwykłe s128, bo minaturki są jednakowej wielkości, tyle że Lightbox takie zdjęcia ignoruje. Czemu -- nie wiem... Nie wiem też jak to zmienić

Jako obejście problemu można przeskalować miniaturkę do jednakowej wysokości. Przykład:

<div>
<span>
<a href="https://lh4.googleusercontent.com/…/epl313_6040342.jpg" 
 imageanchor="1" style="margin-bottom: 1em;"><img border="0" height='85'
 src="https://lh4.googleusercontent.com/…/s128/epl313_6040342.jpg" /></a>
</span>
<span>
<a href="http://lh3.ggpht.com/…/epl313_6040338.jpg" 
 imageanchor="1" style="margin-bottom: 1em;"><img border="0" height='85'
 src="http://lh3.ggpht.com/…/s128/epl313_6040338.jpg" /></a>
</span>
<span>
<a href="http://lh6.ggpht.com/…/epl313_6040339.jpg" 
 imageanchor="1" style="margin-bottom: 1em;"><img border="0" height='85'
 src="http://lh6.ggpht.com/…/s128/epl313_6040339.jpg" /></a>
</span>
<span>
<a href="http://lh5.ggpht.com/…/epl313_6040332.jpg" 
 imageanchor="1" style="margin-bottom: 1em;"><img border="0" height='85'
 src="http://lh5.ggpht.com/…/s128/epl313_6040332.jpg" /></a>
</span>
</div>

Symbolem oznaczono pominiętą część URLa (żeby nie wystawał na margines).

Wynik jest następujący:

Kliknięcie w zdjęcie powoduje przejście do widoku Lightboksa.

Być może za czas jakiś problem zniknie. Wyświetlanie dla tego wpisu 10 zamiast 8 obrazków w widoku Lightboksa będzie tego dowodem:-)

środa, 31 lipca 2013

Wycieczka do Łeby

Wczoraj pojechaliśmy oglądać ruchome wydmy w Słowińskim Parku Narodowym. Wydmy są ruchome, bo przesuwają się na zachód czyli w stronę Łeby z prędkością kilku metrów na rok.

W celu obejrzenia wydm należy pojechać do Rąbki k. Łeby. Z Rąbki jeżdżą melexy albo można jechać rowerem lub iść pieszo. Trasa z Rąbki (około 6km) biegnie lasem przez teren Słowińskiego Parku Narodowego więc trzeba kupić bilet wstępu. Można też iść na wydmy brzegiem morza za darmo (uwaga na wiatr, bo często mocno wieje -- pod wiatr może być mało przyjemnie).

Na wydmy poszliśmy lasem a wróciliśmy Melexem (15 PLN od osoby).

Mniej więcej w połowie drogi między Rąbką a wydmami jest jeszcze wyrzutnia rakiet. Ekstra płatne miejsce -- pozostałość po niemieckim poligonie rakietowym. Nie wchodziliśmy, bo drogo, a atrakcja wydaje się wątpliwa.

Ślad z wycieczki (ze zdjęciami) jest tutaj.

środa, 24 kwietnia 2013

Time lapse: end of first experiment

Because my tomatoes are growing unexpectedly fast I had to stop capturing pictures quicker than I have planned as they do not fit in the frame.

So 2664 pictures was taken from 16.03 to 23.04 at 20 minutes interval. The video size is about 715 Mb and the video length is 3min 43 seconds (at 12 fps or 1:47 at 25 fps).

The videos are available at YouTube: 25 fps | 12 fps

niedziela, 21 kwietnia 2013

Augmenting video files with GPS data

This post describes in detail how to add GPS data to video file using `visual correlation' (see also: Video geocoding with gpsbabel).

Zebra crossing at Osowa
Crossing at Osowa

There is an easy way to augment video files with GPS data using GPSbabel. Since version 1.4 of GPSBabel is able to create a subtitle file from a GPS tracklog. The subtitle contains latitude/longitude/altitude as well as the time. With a simple Perl scripts I have added current speed (not particularly accurate however).

To convert GPX file to subtitles one have to execute:


gpsbabel -i gpx -f FILE.gpx -o subrip,video_time=hhmmss,gps_time=hhmmss,gps_date=YYYYMMDD -F FILE.srt

Where: video_time -- video position (relative to beginning of video) for which exact corresponding GPS timestamp is known. gps_time -- the time part of the GPS timestamp which corresponds to a known position in the video. gps_date -- the date part of the GPS timestamp which corresponds to a known position in the video.

On a video (see below) you can see that in 34 second I passed the zebra crossing. The zebra's crossing coordinates can be easily identified at Google Maps (cf. picture Crossing at Osowa). Now one have to search the GPX track for the point which is nearest to 54.429591/18.477973. I developed a simple Perl script for that purpose:


$ perl My_GPX_nearest_timestamp.pl -c 54.429591:18.477973 20130420.gpx
*** USAGE: My_GPX_nearest_timestamp.pl -c latitude:longitude GPX-file
*** Looking for 20 points near: 54.429591:18.477973 (lat/lon) ***
> 15.3758195746663 2013-04-20T10:27:09Z 54.429509640:18.477780819
> 22.0617273294607 2013-04-20T09:05:15Z 54.429701502:18.478256240
> 32.6458959467509 2013-04-20T10:27:15Z 54.429787332:18.478348190
> 43.3771684316959 2013-04-20T09:05:24Z 54.429531014:18.477310427
> 47.7727043140018 2013-04-20T09:05:11Z 54.429905936:18.478475260
> 63.903936892351 2013-04-20T10:27:00Z 54.429627573:18.476987137
> 70.171200323179 2013-04-20T09:05:28Z 54.429655485:18.476893930

One can stipulate from the above output that I passed a point 15,4 meters away from 54.429591/18.477973 at 10:27:09 GMT as well as I passed another point which is 22 meters away from 54.429591/18.477973 at 09:05:15. As I cycled back and forth along the same route the second point is valid, the first is accidentally closer but as the time is almost one and half hours later it is clear that I was there on returning home. So gpsbabel should be executed as follows (20130420.gpx contains GPX track):


gpsbabel -i gpx -f 20130420.gpx -o subrip,video_time=000034,gps_time=090515,gps_date=20130420 -F 20130420_1.srt

Speed is added with another very simple Perl script:


perl add_speed_2_srt.pl 20130420_1.srt > 20130420_1_S.srt

Just to remind: internally all GPS units record time/date using Coordinated Universal Time aka Greenwich Mean Time vel Zulu time (for army enthusiasts). What the unit displays is another matter (usually it displays local time).

poniedziałek, 15 kwietnia 2013

Pierwszy film poklatkowy

Ustaliłem empirycznie w jaki sposób podłączyć aparat do Raspberry Pi (do SheevaPlug zresztą też) żeby nic się nie zacinało. W skrócie:

  1. Używam kompakta Nikon S3000 (Canon A620 się zacinał/odłączał--sprzedałem go na Allegro).

  2. Podłączam aparat poprzez aktywny USB hub (kupiłem w tym celu cztero-portowy HUB firmy Vivanco).

  3. Po każdym zdjęciu wykonuję reset stosownego portu USB za pomocą programiku pn. usb_reset (zobacz tutaj oraz tutaj).

Kilka aparatów

Używam dwóch aparatów Nikon S3000 (kupionych na Allegro oczywiście), więc jest problem z ustaleniem który jest który:


$gphoto2 --auto-detect
Model Port
----------------------------------------------------------
Nikon Coolpix S3000 (PTP mode) usb:001,022
Nikon Coolpix S3000 (PTP mode) usb:001,021

Można użyć opcji --port usb:001,022 aby wykonać coś z ,,pierwszym'' aparatem oraz --port usb:001,021, aby dostać się do drugiego. Oczywiście umieszczenie numerów portów na-zicher w skryptach byłoby kiepskim pomysłem ponieważ nie są one ustalone, ale się zmienią jeżeli urządzenie zostanie odłączone/przyłączone ponownie. Lepszym sposobem zidentyfikowania aparatów jest wykorzystanie numeru seryjnego:


## $gphoto2 --get-config serialnumber --port PORT
## example
$gphoto2 --get-config serialnumber --port usb:001,022
Label: Serial Number
Type: TEXT
Current: 000047514512

Mam czarnego Nikona o numerze 000041076602 oraz różowego o numerze 000047514512. Używam następującego skryptu do wykonania zdjęcia określonym aparatem:


#!/bin/bash
PINK_CAM_ID='000047514512'
BLACK_CAM_ID='000041076602'

while test $# -gt 0; do
case "$1" in
-b|--black) REQ_CAM="$BLACK_CAM_ID";;
-p|--pink) REQ_CAM="$PINK_CAM_ID";;
esac
shift
done

## Nazwa pliku ze zdjęciem:
FILENAME="NIK`date +"%Y%m%d%H%M"`.jpg"

## Przejrzyj wszystkie podłączone aparaty:
while read PORT_ID
do
##echo $PORT_ID
## -n means string is non-empty
if [ -n "$PORT_ID" ] ; then
CAM_ID=`gphoto2 --get-config serialnumber --port $PORT_ID | awk '/Current:/ { print $2 }' `
if [ $CAM_ID = "$REQ_CAM" ] ; then
REQ_CAM_PORT="$PORT_ID"
##echo "*** Req Camera ID: #$CAM_ID."
fi
fi

done <<< "`gphoto2 --auto-detect | grep usb | awk '{ print $6}'`"

# Na wypadek błędu wyślij alarmowego SMSa
if [ -z "$REQ_CAM_PORT" ] ; then
echo "*** Error: Camera $REQ_CAM not found ***"
## sent a SMS cf http://pinkaccordions.homelinux.org/wblog/sms_alerts_with_google_calendar.html
sms_reminder.sh
exit 1
fi

## reset USB
REQ_CAM_PORT_DEVNAME=`echo $REQ_CAM_PORT | sed 's/^.*://' | sed 's/,/\//'`
usb_reset /dev/bus/usb/${REQ_CAM_PORT_DEVNAME}

LANG=C gphoto2 --port "$REQ_CAM_PORT" --force-overwrite --set-config flashmode=1 \
--set-config d002=4 \
--capture-image-and-download --filename "$FILENAME"

## reset USB (powtórny)
usb_reset /dev/bus/usb/${REQ_CAM_PORT_DEVNAME}

Właściwość d002 ustawia rozdzielczość zdjęcia (4 oznacza 2592x1944).

Wartość 1 właściwościflashmode wyłącza flash.

Z moich eksperymentów wynika, że bez wykonania usb_reset bateria aparatu nie jest doładowywana (czemu?) i po pewnym czasie z powodu braku zasilania aparat odłącza się.

Film

Po czterech tygodniach mam wystarczająco dużo zdjęć aby spróbować zrobić pierwszy film.

Najpierw konwertuję wszystkie zdjęcia do rozdzielczości 1920x1080 za pomocą programu convert (z zestawu ImageMagick) uruchamianego z ,,wewnątrz'' prostego skryptu Perla. Ponieważ nazwy plików wejściowych są konstruowane wg schematu NIKYYYYMMDDHHMM.jpg (gdzie YYY to rok, MM oznacza miesiąc, itd.) sortowanie alfabetyczne oznacza ustawienie ich także we właściwym porządku chronologicznym. Nazwy plików wynikowych są zaś konstruowane jako: hd1920_00001.jpg, hd1920_00002.jpg, itd.


#!/usr/bin/perl

opendir (DIR, ".");
my @files = sort { $a cmp $b } readdir(DIR);

while (my $file = shift @files ) {
if ($file =~ /.jpg$/) { $fileNo++;
$file_out = sprintf "hd1920_%05d.jpg", $fileNo;
print "$file -> $file_out\n";
system ("convert", $file, "-geometry", "1920x1080", "$file_out");
}
}

Okazało się, że jest dokładnie 1784 zdjęć:


$ls -l hd1920_0* | wc -l
1784

Konwersja trwała około 30 min na moim przeciętnym zupełnie PC-cie. Każdy plik wynikowy miał około 0,5Mb; wszystkie razem zajmowały około 0,85Gb:


$ls -l hd1920_0* | awk '{t+=$5}; END{print t}'
853332231

Film został wykonany za pomocą programu ffmpeg:


ffmpeg -r 12 -qscale 2 -i hd1920_%05d.jpg Tomato_12.mp4

Gdzie -r 12 oznacza liczbę klatek na sekundę (12 fps) a -qscale określa jakość (1 oznacza najlepszą, 32 najgorszą jakość).

Film ma około 450 Mb. Konwersja zajmuje około 3min (on my decent PC) a długość filmu to 2min i 29 sekundy.

Film przedstawia sadzonkę pomidora (Pinkaccordion oczywiście :-). Zdjęcia były robione co 20 minut od 16 marca do 11 kwietnia.

Są także wersje na 25 fps oraz 6 fps.

sobota, 13 kwietnia 2013

Ponura historia sprzed lat

Jak byłem dawno temu w Anglii, to akurat w BBC puszczono film dokumentalny nt. następujących zdarzeń: Aidan Starrs, Gregory Burns i John Dignam -- agenci FRU oraz członkowie IRA mordują 30 czerwca 1992 r. Margaret Perry z obawy, że ta ostatnia może ich wydać. Morderstwo M. Perry pozostaje niewyjaśnione przez ponad rok -- do czasu aż mordercy Perry zostają porwani i zabici przez ISU, czyli kontrwywiad Armii Republikańskiej. Na dokładkę okazało się po latach, że w ISU latami działał inny agent FRU Freddie Scappaticci. Tak mi się to przypomniało a szczegóły wyguglałem, bo przecież po latach tych wszystkich detali i nazwisk nie pamiętałem.

Notka w BBC na temat.

piątek, 12 kwietnia 2013

Time lapse: first production

After almost 4 weeks I have enough pictures to create my first video production. (How to capture images with a still camera attached to Raspberry Pi is described here and here.)

I started from converting all pictures to 1920x1080 resolution with convert run from a simple Perl script. As the input file names are constructed as NIKYYYYMMDDHHMM.jpg (where YYY denotes year, MM denotes month etc) alphabetic sorting is OK. The resulting files are named as hd1920_00001.jpg, hd1920_00002.jpg, etc.


#!/usr/bin/perl

opendir (DIR, ".");
my @files = sort { $a cmp $b } readdir(DIR);

while (my $file = shift @files ) {
if ($file =~ /.jpg$/) { $fileNo++;
$file_out = sprintf "hd1920_%05d.jpg", $fileNo;
print "$file -> $file_out\n";
system ("convert", $file, "-geometry", "1920x1080", "$file_out");
}
}

There are exactly 1784 pictures:


$ls -l hd1920_0* | wc -l
1784

Conversion of all images lasted circa half an hour on my decent PC. Each picture size is about 0,5Mb, while the total size is 0,85Gb:


$ls -l hd1920_0* | awk '{t+=$5}; END{print t}'
853332231

To create a video from the images I run ffmpeg now:


ffmpeg -r 12 -qscale 2 -i hd1920_%05d.jpg Tomato_12.mp4

Where -r 12 means frames ratio (12 fps) and -qscale determines video quality (1 denotes best quality and 32 is the lowest one).

The video size is about 450 Mb. The conversion takes circa 3min (on my decent PC) and the video length is 2min 29 seconds.

The movie's subject is a growing tomato (Pinkaccordion variety of course:-). The photographs were taken every 20 minutes from March 16th to April 11th.

There are versions at 25 fps and 6 fps as well.

czwartek, 4 kwietnia 2013

Raspberry Pi: some progress with time-lapse photography

I have made some progress in accessing still camera with gphoto2 (cf. here). The detailed description of my set-up will be disclosed within a few weeks (as I am still not sure if it is 100% success:-). In short:

I changed camera from Canon A620 to Nikon S3000.

I connected camera with active USB hub.

On every capture USB port is reset with usb_reset utility (cf here and here)

Multiple cameras

I use two Nikon S3000 compact cameras so there is a problem how to identify which is which.


$gphoto2 --auto-detect
Model Port
----------------------------------------------------------
Nikon Coolpix S3000 (PTP mode) usb:001,022
Nikon Coolpix S3000 (PTP mode) usb:001,021

So one can use --port usb:001,022 option to access first attached camera and --port usb:001,021 to access the second one. Of course hard-coded port numbers are troublesome as they are not fixed and change if the device is disconnected/connected again. Better way to identify the camera is to use it's serial number:


## $gphoto2 --get-config serialnumber --port PORT
## example
$gphoto2 --get-config serialnumber --port usb:001,022
Label: Serial Number
Type: TEXT
Current: 000047514512

I have black Nikon with 000041076602 serial number and pink one with 000047514512 serial number. I use the following bash script to access the cameras:


#!/bin/bash
PINK_CAM_ID='000047514512'
BLACK_CAM_ID='000041076602'

while test $# -gt 0; do
case "$1" in
-b|--black) REQ_CAM="$BLACK_CAM_ID";;
-p|--pink) REQ_CAM="$PINK_CAM_ID";;
esac
shift
done

## Picture filename:
FILENAME="NIK`date +"%Y%m%d%H%M"`.jpg"

## Scan all attached cameras:
while read PORT_ID
do
##echo $PORT_ID
## -n means string is non-empty
if [ -n "$PORT_ID" ] ; then
CAM_ID=`gphoto2 --get-config serialnumber --port $PORT_ID | awk '/Current:/ { print $2 }' `
if [ $CAM_ID = "$REQ_CAM" ] ; then
REQ_CAM_PORT="$PORT_ID"
##echo "*** Req Camera ID: #$CAM_ID."
fi
fi

done <<< "`gphoto2 --auto-detect | grep usb | awk '{ print $6}'`"


if [ -z "$REQ_CAM_PORT" ] ; then
echo "*** Error: Camera $REQ_CAM not found ***"
## sent a SMS cf http://pinkaccordions.blogspot.com/2013/03/automatic-sms-alerts-using-google.html
sms_reminder.sh
exit 1
fi

## reset the USB device
REQ_CAM_PORT_DEVNAME=`echo $REQ_CAM_PORT | sed 's/^.*://' | sed 's/,/\//'`
usb_reset /dev/bus/usb/${REQ_CAM_PORT_DEVNAME}

LANG=C gphoto2 --port "$REQ_CAM_PORT" --force-overwrite --set-config flashmode=1 \
--set-config d002=4 \
--capture-image-and-download --filename "$FILENAME"

## reset the USB device again
usb_reset /dev/bus/usb/${REQ_CAM_PORT_DEVNAME}

Property d002 sets picture resolution (4 means 2592x1944).

Value 1 of flashmode turns-off flash.

It seems that without usb_reset there are problems with battery charging (why?)

środa, 27 marca 2013

LaTeX: example of a complex titlepage design

Let's start from example preamble:


\documentclass[twoside]{article}
\usepackage{fancyhdr}

\pagestyle{fancy}
\renewcommand{\headrulewidth}{0.4pt}
\renewcommand{\footrulewidth}{0.4pt}

\makeatletter
%% headlines (\@shorttitle/\@shortauthorlist see below):
\fancyhead[RO]{\@shorttitle}
\fancyhead[LE]{\@shortauthorlist}

...
\makeatother

% Title (in Polish) and alternate title (in english):
\title{Hemofiltracja i~rewaskularyzacja u~pacjenta
z~zespołem sercowo-nerkowym typu 2}
\alttitle{Hemofiltration in patient with cardio-renal syndrome type 2}

% Authors list:
\author{WLUJ}{Janina Kowalska }
\author{CIL}{Zofia Dyrman}
\author{KCW}{Andrzej Jarzyna}
\author{CIL}{Wacław Jarząbek}
\author{CIL}{Krzysztof Chrostowicz}
% Undefined affiliation raises an error:
% \author{DoPX}{Zdzisław Dyrman}

% Affliations list:
\affiliation{WLUJ}{Wydział Lekarski Uniwersytetu Jagiellońskiego
-- Collegium Medicum, ul.~św.~Anny 12, 31--008 Kraków}
\affiliation{CIL}{Centrum Interwencyjnego Leczenia Chorób Serca
i~Naczyń, KSzS im.~Jana Pawła II, ul. Prądnicka 80, 31--202 Kraków}
\affiliation{KCW}{Klinika Choroby Wieńcowej UJ, Collegium Medicum,
KSzS im. Jana Pawła II, ul. Prądnicka 80, 31--202 Kraków}
% Extra affiliation raises an error:
% \affiliation{DRS}{Druskienniki, Pendological Department}

% Short versions of title/authors list (defined if title/authors list
% is too long to fit the headlines:
% \shortauthor{Tratata}
% \shorttitle{Fififif}
%
\begin{document}
\maketitle

\end{document}
LaTeX example titlepage
The titlepage

The main problem is long lists of authors and affiliations. There are more authors than affiliations so affiliations are labelled with consecutive numbers and each author is marked with appropriate label indicating his/her affiliation. It can be done manually of course but with the help of a few clever macros the numbers can be computed by LaTeX. This feature can be particularly helpful when for instance just before the (printing house) deadline a very important author (probably professor) insists his affiliation should be 1 not 4 (for example). All is needed to achieve this is to reorder \affiliation declarations.

The resulting document looks like shown in the picture.

The macros used:


%++Authors and affiliations
\newcount \authornumber
\newcount \affiliationnumber
\authornumber=0
\affiliationnumber = 0
%
\def\alttitle#1{\gdef\@alttitle{#1}}%
\def\shortalttitle#1{\gdef\@shortalttitle{#1}}

\def\author#1#2{%
\global\advance\authornumber\@ne
\authorAffiliationId{#1}% -- label --
\authorName{#2}% -- author's name --
}
%
\def\authorAffiliationId#1{%
\expandafter\def\csname theauthorid\number%
\authornumber\endcsname {#1}% --author's id--
%% label defined to check if affiliation exists:--
\expandafter\def\csname theaffid:#1\endcsname {#1}%
}
%
\def\authorName#1{%
\expandafter\def\csname theauthor\number%
\authornumber\endcsname{\ignorespaces#1\unskip}%
\expandafter\let\csname theauthoraffiliation\number%
\authornumber\endcsname\relax
}
%
\def\affiliation#1#2{%
\global\advance\affiliationnumber\@ne
\expandafter\def\csname theaffiliation \number%
\affiliationnumber \endcsname {\ignorespaces#2\unskip}%
\expandafter\edef\csname affid:#1\endcsname {\number\affiliationnumber}%
%% if defined in class CLS add error mesage:
%%\@ifundefined{theaffid:#1}{\ClassError{CLS}{**Affiliation undefined: `#1'}\@ehc}{}%
}
%
\def\@author{\@defaultauthorlist}
\def\@affiliation{\@defaultaffiliationlist}
%
\newcount\count@@
%
% Authors/affiliations lists
\def\@defaultauthorlist{%
\count@=\authornumber
\count@@=0
\begingroup
\loop
\ifnum\count@>0
\advance\count@@ by 1
\ignorespaces\csname theauthor\number%%
\count@@\endcsname %-- autor's name --
\edef\@TmP@Aff@Etykieta{\csname theauthorid\number\count@@ \endcsname}%
% --check if \@TmP@Aff@Etykieta exists: --
\@ifundefined{affid:\@TmP@Aff@Etykieta}%
%% if defined in class CLS add error mesage:
%%{\ClassError{CLS}{**Brak afiliacji dla \csname theauthor\number%
%%\count@@\endcsname}\@ehc}%
%% print out affiliation label (number):
{$^{\csname affid:\@TmP@Aff@Etykieta\endcsname}$}%
%--Every author but last is separated by a comma--:
\ifnum\count@=1\relax\else,\space\fi
\advance\count@ by -1
\repeat
\endgroup
}
% Short list of authors (w/o affiliations labels) for headlines.
% Simplified version of @defaultauthorlist:
\def\@defaultshortauthorlist{%
\count@=\authornumber
\count@@=0
\begingroup
\loop
\ifnum\count@>0
\advance\count@@ by 1
\ignorespaces\csname theauthor\number\count@@\endcsname
\ifnum\count@=1\relax\else,\space\fi
\advance\count@ by -1
\repeat
\endgroup
}
%
% Affilitions list:
\def\@defaultaffiliationlist{%
\count@=\affiliationnumber
\count@@=0
\begingroup
\loop
\ifnum\count@>0
\advance\count@@ by 1
$^{\the\count@@}$ %-- affiliation number
%-- print out the affiliation:
\ignorespaces\csname theaffiliation \number\count@@\endcsname
% ++Every affiliation but last is separated by a comma ++ :
\ifnum\count@=1\relax\else,\space\fi
% każda afiliacja od nowego wiersza:
\par
\advance\count@ by -1
\repeat
\endgroup
}
% ++++++++++++++++++++++++++++++++++++++++++++++++++++++++++++++
% ++SIMPLIFIED titlepage (just to demonstrate macros defined):++
\renewcommand\maketitle{%
\begin{titlepage}%
\let\footnotesize\small
\let\footnoterule\relax
\let \footnote \thanks
% ++Title: ++
\parindent0pt
\rightskip0pt plus 4em \pretolerance10001
\leavevmode \noindent
{\Large \sffamily \bfseries
\@title\par
% ++ Optional alternative title:
\@ifundefined{@alttitle}{}{\vskip9pt%
\large \sffamily \bfseries \@alttitle \par} }
\vspace{5mm}
% ++Authors list:
{\rightskip 0pt plus6em%
\@author\par}
%
\vspace{30pt}
% ++Affiliations list
{\rightskip 0pt plus6em \@affiliation\par}
%
% ++Define content for running headers/footers:
\@ifundefined{@shortauthorlist}{\gdef\@shortauthorlist{\@defaultshortauthorlist}}{}%
\@ifundefined{@shorttitle}{\gdef\@shorttitle{\@title}}{}%
\@ifundefined{@shortalttitle}{\gdef\@shortalttitle{\@alttitle}}{}%
%
\thispagestyle{empty}
\end{titlepage}%
%
\setcounter{footnote}{0}%
\global\let\thanks\relax
\global\let\maketitle\relax
\global\let\@thanks\@empty
\global\let\title\relax
\global\let\author\relax
\global\let\date\relax
\global\let\and\relax
}%%//maketitle//

\def\shorttitle#1{\gdef\@shorttitle{#1}}
\def\shortauthorlist#1{\gdef\@shortauthorlist{#1}}
\let\shortauthor\shortauthorlist

wtorek, 26 marca 2013

LaTeX: how to highlight some bibliography entries by adding an asterisk before the entry?

Author-year citation style is assumed.

If a bibliography is prepared manually it is as easy as to precede each entry with say \bibAst command. Example:

\newcommand\bibAst{\leavevmode\hbox to0pt{\hss$^\ast$}}

\harvarditem[Bagozzi and Dholakia]{Bagozzi and
Dholakia}{2006}{bagozzidholakia06}
\bibAst\textsc{Bagozzi, R.~P., {\small and} U.~M. Dholakia} (2006): ``Open
Source Software User Communities: A Study Of Participation In {L}inux {U}ser
{G}roups,'' \emph{Management Science}, 52(7), 1099--1115.

If one insists on using BiBTeX one has to mark records which are to be highlighted. It can be done with an extra field (named highlight in the example below):


@Article{bagozzidholakia06,
title = "Open Source Software User Communities: A Study Of
Participation In {L}inux {U}ser {G}roups",
author = "Bagozzi, Richard P. and Dholakia, Utpal M.",
journal = j-msci,
pages = "1099--1115",
number = "7",
volume = "52",
year = "2006",
highlight = "Y"
}

Fields unknown to BiBTeX's particular style are omitted, so highlight cause no harm when processed with standard BiBTeX style.

One need to modify BiBTeX style now. This is a two-step procedure. First one has to add highlight to the body of ENTRY function:


ENTRY
{
...
highlight
}

Next one has to modify format.authors function. Exact form of a format.authors function is style-dependent. In case of apalike the code looks like:


%FUNCTION {format.authors}
%{ author empty$
% { "" }
% { author format.names }
% if$
%}
% change to:
FUNCTION {format.authors}
{ author empty$
{ "" }
{ highlight empty$
{ author format.names }
{ "{\bibAst}" author format.names * }
if$
}
if$
}

BTW: the meaning of some BiBTeX expressions are as follows: S1 S2 * denotes S1 S2 strings concatenation; L F1 F2 if$ denotes logical if (execute F1 if L is true otherwise execute F2).

The contents of highlight is irrelevant. Sole existence of highlight denotes that the record is highlighted.

NOTE: the style should be more elaborate if some BiBTeX entries starts with something other than authors names.

piątek, 22 marca 2013

Automatic SMS Alerts Using Google Calendar

The idea is to add an event to Google calendar with some short start time from now (say 15 minutes) and SMS reminder feature.


#!/bin/bash
# reminder via google with 15 minutes from now start time
#
MESSAGE="Neptune ALARM: something nasty has happened!"

# In case of service failure try 3 times:
for i in 1 2 3; do

# Compute 15min from now time with date:
NOW=`date "+%s"`
TIME_SHF1=$(($NOW + 900 ))
FWD_TIME1=`date +"%d/%m/%Y %H:%M" -d"@$TIME_SHF1"`;

# Check for optional script argument
if [ -n "$1" ] ; then MESSAGE="Neptune ALARM: $1" ; fi

# use GoogleCL to add to calendar with 15m from now/1m reminder
google calendar add "$MESSAGE $FWD_TIME1" --reminder="1m"

RC=$?

if [ $RC -ne 0 ] ; then
sleep 30;
else
break ;
fi

done

The script uses GoogleCL (a python-based command-line utility for accessing Google). Installing GoogleCL is easy:


sudo apt-get install googlecl
# or (in case there is no ready-to install package):
wget http://googlecl.googlecode.com/files/googlecl-0.9.13.tar.gz
tar -zxvf googlecl-0.9.13.tar.gz
cd googlecl-0.9.13
sudo python setup.py install

Note: googleCL is launched via google not googleCL command.

The first time one uses googleCL, ie:


google calendar add "test from neptune 22/03/2013 10:30:22"

it will prompt for one's Google username. One has to type it in and hit enter. Next the user is asked to grant access permissions.

On non-gui systems (text-based) w3m browser usually will be launched. When connected to google one has to press q y and the text silimlar to the following will be displayed:


Please log in and/or grant access via your browser
at https://www.google.com/accounts/OAuthAuthorizeToken?oauth_token=\
4%xxxxxxxxxxxxxxxxxxxxxxxxxxxxxx&hd=default then hit enter.

One has to copy the above link to another machine (with gui browser). Next one has to grant access and then go back to the terminal and hit enter to complete the authorization.

BTW the access token is stored in:


~/.local/share/googlecl/access_tok_USERNAME

If access is granted from some machine it will probably suffice to copy the access token file to another machine to grant access for it as well (not tested).

The configuration file for googleCL is in:


~/.config/googlecl

If access is grated successfully the message similar to the following will be displayed:


Event created: http://www.google.com/calendar/event?eid=\ anFsdGFucXFwdmZnbW1sMmcwc2t1NDI3cm8gbG9vc2VoZWFkcHJvcDFAbQ

piątek, 15 marca 2013

LaTeX: znaki cięcia/pasery, pakiety crop i fancyhdr

Kol. WP dba żebym nie wyszedł z wprawy w temacie znajomości LaTeXa.

Jakiś czas temu zażyczył sobie znaków cięcia (zwanych także paserami). Znaki cięcia mają określać wielkość kartki papieru jako 290x205mm (prawie A4). Mają być umieszczone na stronie o nietypowych wymiarach 330x250mm.

Używając pakietu crop można powyższe zalecenie zrealizować następująco:


\documentclass{article}

%% Inne pakiety dołączyć tutaj ...

\setlength\paperheight {290mm}\setlength\paperwidth{205mm}
\usepackage[cam,center,width=250truemm,height=330truemm,pdftex]{crop}
%%
%% Kolumna ma być wyśrodkowana na kartce (zalecenie drukarni)
%% Margines wynosi ( \paperwidth -\textwidth )/2
\oddsidemargin 18.5truemm %% dla \textwidth = 168mm
\evensidemargin\oddsidemargin

\begin{document}

...

\end{document}

No i działa. Dokument jest składany XeTeXem; używa w związku z tym pakietów polyglossia, fontspec, xunicode oraz xltxtra. Powyższe pakiety korzystają z kolei ze stada pakietów z l3kernel/l3packages bundles (fragment przyszłej, ciągle tworzonej od 20 bodajże lat, trzeciej wersji LaTeXa -- LaTeX3 project).

Po jakimś czasie okazało się, że nie działa w MikTeX 2.09. Pierwsza (tytułowa) strona jest podniesiona (względem znaków cięcia) o ok 4mm w porównaniu do wszystkich następnych.

Po dłuższym badaniu stwierdzono, że winna jest dwuwierszowa pagina górna znajdująca się na stronie tytułowej. Wydawała się niegroźna i co więcej, dokument był poprawnie kompilowany, ale tylko w dystrybucji TL 2011. Coś zmieniono w zestawie pakietów l3* (których jest dużo jak wiemy) i to te pakiety odpowiadają za błąd.

Żeby obejść problem postanowiłem składać dwuwierszową paginę w pudełko pionowe (\vbox) o wysokości równej wysokości wiersza tekstu:


\setbox0\hbox{\PM@HeaderFont\strut} %%
\newdimen\PM@HeaderHt \PM@HeaderHt=\ht0
\def\PM@vboxToOneLine#1{\vbox to\PM@HeaderHt{#1\vss}}
%% ^^^^^^^ pudełko o wysokości wiersza tekstu ^^
%% %% ...
\fancypagestyle{plain}{%% zawartość paginy na stronie tytułowej:
\fancyhf{} %
%% ...
\fancyhead[L]{\leavevmode
\hbox{\PM@vboxToOneLine{\PM@HeaderFont pierwszy-wiersz ... \\
... drugi wiersz ...}}} %
\fancyhead[R]{\leavevmode
\hbox{\PM@vboxToOneLine{\PM@HeaderFont pierwszy-wiersz ... \\
... drugi wiersz ...}}}
%% ...
}

Teraz działa lepiej.

Nawiasem mówiąc dwuwierszowe paginy to kiepski pomysł. W szczególności fancyhdr wyrównuje górne wiersze pagin, co oznacza, że np. kreska pod paginą będzie nie wyrównana jeżeli (przykładowo) lewa pagina jest dwuwierszowa a prawa jednowierszowa. W omawianym przypadku nie ma kreski pod paginą, dwuwierszowa pagina jest zdefiniowana wyłącznie na stronie tytułowej (której układ jest znakomicie różny od pozostałych stron) a i tak skończyło się problemem.

środa, 6 marca 2013

Raspberry Pi: first steps with time-lapse photography

A620 powered with CA-PS500 adapter
A620 powered with CA-PS500
A620 with improvised sun cover
A620 (side view)

I would like to remote control a still camera via gphoto2. After consulting a  list of supported cameras I bought (used) Canon A620 from Allegro (local Internet auction site, sort of E-bay).

This camera has many great features (I suspect even too great as Canon stop producing cheap cameras of this sort): viewfinder, retractable LCD and can be powered with Compact Power Adapter CA-PS500 instead of batteries (an important feature in my project). The plan was simple: connect camera via USB cable to computer and power it with PSU. Capture photos periodically with gphoto2:


gphoto2 --auto-detect

pi@raspberrystar ~/bin $ gphoto2 --auto-detect
Model Port
----------------------------------------------------------
Canon PowerShot A620 (PTP mode) usb:001,006

So far, so good.

Now, I tried to capture a photo:


# one shot without flash, download the file and store in a file named as: GPHyyyymmddhhmm.jpg
LANG=C gphoto2 --set-config flashmode=0 --capture-image-and-download --filename "GPH%Y%m%d%H%M.jpg"

As the creation time is wrong (due to camera wrong clock) I modified the above as follows (note that touch is used to adjust file's timestamp):


#!/bin/bash
FILENAME="GPH`date +"%Y%m%d%H%M"`.jpg"

LANG=C gphoto2 --set-config flashmode=0 --capture-image-and-download --filename "$FILENAME"
touch "$FILENAME"

Unfortunately there are problems: I am able to remotely capture only one photo. Next remote capture try results in an error and the camera has to be hard reset (with power on/off button). The problem is reported by others too.

BTW: when I connected the camera to my PC the reliability is much better (but seems not perfect---I experienced camera disconnection too.)

My first try to resolve the problems was to update gphoto2 (raspbian contains version 2.4.14 of gphoto2).

Compiling newest (march 2013) version of gphoto2 on Raspberry Pi


## optionally remove old version (there are no dependencies)
apt-get remove gphoto2

There is no need to remove gphoto2 as compiled one will be installed in another directory (/usr/local/ vs /usr/).

First install/compile the necessary packages:


apt-get install -y libltdl-dev libusb-dev libexif-dev libpopt-dev

## Download and install newer version of libusb 1.0.11
wget http://ftp.de.debian.org/debian/pool/main/libu/libusbx/libusbx_1.0.11.orig.tar.bz2
tar xjvf libusbx_1.0.11.orig.tar.bz2
cd libusbx-1.0.11/

./configure && make && sudo make install

## Download and install newer version of libgphoto
wget http://garr.dl.sourceforge.net/project/gphoto/libgphoto/2.5.1.1/libgphoto2-2.5.1.1.tar.bz2
tar xjf libgphoto2-2.5.1.1.tar.bz2
cd libgphoto2-2.5.1.1

./configure && make && sudo make install

Download and install newer version of gphoto2


wget http://downloads.sourceforge.net/project/gphoto/gphoto/2.5.1/gphoto2-2.5.1.tar.gz
tar xzvf gphoto2-2.5.1.tar.gz
cd gphoto2-2.5.1

./configure && make && sudo make install

## run ldconfig
sudo ldconfig
gphoto2 --version
gphoto2 2.5.1

Copyright (c) 2000-2013 Lutz Mueller i inni

BTW compiling gphoto2 on my fedora 14 box requires to install libtool-ltdl-devel popt-devel first:


#configure: error: cannot compile and link against libltdl
#libgphoto2 requires libltdl (the libtool dl* library),
#but cannot compile and link against it.

yum -y install libtool-ltdl-devel popt-devel

Upon installing above two packages, the compilation of libusb, libgphoto and gphoto2 proceeds smoothly.

Unfortunately installing new version of gphoto2 did not help.

The problem will be further examined...

Video geocoding with gpsbabel

contour camera mounted at bike frame
Contour camera

NOTE: This post is (partially) obsolete as I prefer `visual correlation' method now (see my newer post.)

Some time ago I bought a Contour HD camera on Ebay and the seller claimed he was selling it as he want to upgrade to GPS enabled model. That inspired me to investigate how I can do the same with the camera lacking build-in GPS receiver. For example to geotag photos one can use GPS enabled still cameras, but usually it is a costly luxury and it suffice to synchronize GPS log with a photo timestamp. Using this approach I have developed a simple bash scripts which works neatly with all my cameras. So I can geotag my photographs without wasting a lot of time.

In case of video images the approach is similar: one has to synchronize video and GPS data. The best approach is to film the display of the GPS unit showing the GPS time. In case when the camera is unable to get a good quality image (because the digits are too small for example as in case of my Garmin Legend) a simple trick can be used: just one has to write down time on a sheet of paper (using 15-30 seconds time-ahead) and in a appropriate moment film it. Or one can says out loudly the time displayed if the microphone is able to record it. Looks silly and old fashioned but works. Instead of the above two methods one have to establish initial video geolocation with `visual correlation' method (described in the next paragraph).

The camera Pause button should not be used as it breaks out the GPS-camera synchronization. Namely after every pause one has to establish correct initial geolocation which can be difficult but not impossible (`visual correlation' can be used ie. inspecting video for distinguishable objects which geo-position can be established). I think the advantage of GPS-equipped camcorder boils down to that aspect (one can use Pause w/o worrying that his/her video will be out of sync.) but I suspect to take this extra advantage some extra software is needed which almost for sure runs on MS Windows. For a Linux users it can be usless or at least troublesome.

The only method I tried to augment video files with GPS data is to convert them to video subtitles. Since version 1.4 of GPSBabel is able to create a subtitle file from a GPS tracklog. The subtitle contains latitude/longitude/altitude as well as the time and current speed.

To convert GPX file to subtitles one have to execute:


gpsbabel -i gpx -f FILE.gpx -o subrip,video_time=hhmmss,gps_time=hhmmss,gps_date=YYYYMMDD -F FILE.srt

Where: video_time -- video position (relative to beginning of video) for which exact corresponding GPS timestamp is known. gps_time -- the time part of the GPS timestamp which corresponds to a known position in the video. gps_date -- the date part of the GPS timestamp which corresponds to a known position in the video.

Let's assume that the recorded image of GPS display appears in 15 second of the captured image. One has to look for (inside GPX file) the timestamp containing the exact time displayed (element <time> inside element <trkpt>). Let's assume this timestamp is <time>2013-02-07T09:58:29Z</time>. To convert GPX to subtitles one has to run:


gpsbabel -i gpx -f FILE.gpx -o subrip,video_time=000015,gps_time=095829,gps_date=20130207 -F FILE.srt

Just to remind: internally all GPS units record time/date using Coordinated Universal Time aka Greenwich Mean Time vel Zulu time (for army enthusiasts). What the unit displays is another matter (usually it displays local time).

My first geotagged video obtained using method described above can be seen here.

sobota, 23 lutego 2013

Full page insertions without headers/footers

For some time I help WP in editing a journal for which LaTeX is used. The journal uses simple twocolum layout with multicolumn package. For headers/footers fancyhdr package is used. Recently I was asked to enable full page insertions with headers/footers suspended (probably for big advertisements).

The task is not as straightforward as it seems for a novice user of LaTeX. The following naive approach (\thispagestyle inside float environment) usually fails:


\begin{figure*}{p}
\thispagestyle{empty}
...
\end{figure}

LaTeX will supress headers/footers on the page at which \thispagestyle command was executed, not on the page at which the float was finally inserted. If the float is moved to the next page(s), headers/footers will be suspended on the wrong page.

Fortunately fancyhdr provides the \iffloatpage macro that can be used to customize headers and footers for pages which contain only floats. The use of \iffloatpage is simple:


\pagestyle{fancy}
%% supress rules
\renewcommand{\headrulewidth}{\iffloatpage{0pt}{0.4pt}}
\renewcommand{\footrulewidth}{\iffloatpage{0pt}{0.4pt}}
%%
\fancyhead[RO]{\iffloatpage{}{\PM@HeaderFont \@shorttitle}}
\fancyhead[LE]{\iffloatpage{}{\PM@HeaderFont \@shortauthorlist}}
%%
\fancyfoot[RO]{\iffloatpage{}{\PM@FooterFont\thepage}}
\fancyfoot[LE]{\iffloatpage{}{\PM@FooterFont\thepage}}

%% then in the document body:

\begin{figure*}{p}
%% --stuff to insert-- %%
\end{figure*}

Note: ``private'' (ie. defined in my class) commands \PM@HeaderFont/\PM@HeaderFont set the font for headers/footers and \@shorttitle/\@shortauthorlist insert some content.

czwartek, 14 lutego 2013

Jonas Wolk

W angielskiej wersji pamiętnika Rudolfa Hoessa jest taki oto pasus: ,,In this connection, I must make the following statement. I was opposed to Der Stuermer, Streicher's anti-semitic weekly, because of the disgusting sensationalism[...] This paper caused a lot of mischief and, far from serving serious anti-Semitism, it did it a great deal of harm. It is small wander that after a collapse it was learnt that a Jew edited the paper and that he also wrote the worst of the inflammatory articles it contained.'' I tu następuje dopisek tłumacza: ,,It is not known on what grounds Hoess makes this assertion, for which no evidence can be found.''

Otóż w materiałach Międzynarodowego Trybunału Wojskowego, które są udostępnione na stronach projektu Avalon. Znajduje się Document No. 1757-PS (Nazi Conspiracy and Aggression Volume IV) zawierający ,,Report of Goering's Commission for the investigation of the Aryanisations carried out in the Gau of Franconia between 9.11.38 and 9.2.39 and the irregularities connected there with which have been established'':

From 1934 to 1938 Gauleiter Streicher employed the Jew Jonas Wolk as contributor to the Stuermer. Wolk wrote for the Stuermer under the pseudonym of ,,Fritz Brandt''. In addition, Wolk did spy work for the Gauleiter abroad. From February 1937 to August 1938 the Stuermer paid the Jew Wolk a fee of Reichsmark 8,262.39. Wolk was previously convicted six times, among other things with loss of civic rights. It is especially significant that Streicher had the Jew Wolk paid by the Fraenkische Tageszeitung from 1934 to 1937. The Fraenkische Tageszeitung paid Wolk the sum of Reichmark 9,623.65

Na co wskazuje nazwa komisji była to kontrola sposobu przejęcia mienia żydowskiego w Franken gau (Gau of Franconia). Komisja pracowała w 1939 albo 1940 r. (w 1940 J. Straicher został usunięty z funkcji gauleitera).

Zapewne ów Jonas Wolk był renegatem opłacanym przez Streichera. Mógł nawet być Żydem wyłącznie w rozumieniu ustaw norymberskich a nie należeć do wspólnoty Żydowskiej i nie uważać się za Żyda. Tego typu ludzie zawsze byli i będą i m.in sukcesy policji każdego kraju są oparte na zatrudnianiu takich Wolków (co było wolno RSHA nie było wolno Straicherowi). Nie ma w tym epizodzie nic niezwykłego...

Nawiasem mówiąc jak się wpisze Wolk+Streicher do Google, to głównie pojawiają się strony różnych oszołomów (żeby nie powiedzieć durniów), w rodzaju Storm Frontu. Dla nich to pewnie ,,dowód'' na ,,przewrotność natury Żydów''...

Hoess został zatrzymany przez brytyjską żandarmerię niedaleko Flensburga 11 marca 1946 r. Już w maju 1946 r. został przekazany władzom polskim. Został skazany na śmierć a wyrok wykonano w kwietniu 1947 r. Pamiętnik został napisany w polskim więzieniu na początku 1947 r., a więc między innymi po wykonaniu wyroku na skazanych w głównym procesie norymberskim (październik 1946).

Rudolf Hoess: Commandant Of Auschwitz (Age of Dictators 1920--1945), Phoenix (isbn: 1842120247)